You can record a time in a survey using the time question on Collect. This can either be the time of data collection or any other time like time of last check-up, etc. In addition to the basic elements like question title, Collect allows you to add limits and validations to ensure quality data collection. In this article, we will discuss:
- How to create a time question on Collect web
- How to answer a time question on Collect app
A. Creating a Time Question
A time question has multiple elements like question title, question keyword, description, and some validations and settings. To understand them better, we will take a sample choice question and create it on Collect.
Example: In a warehouse that packs goods, we want to record packing begin and packing end time for every batch of products. We will create a time question for this. It will look like the image below.
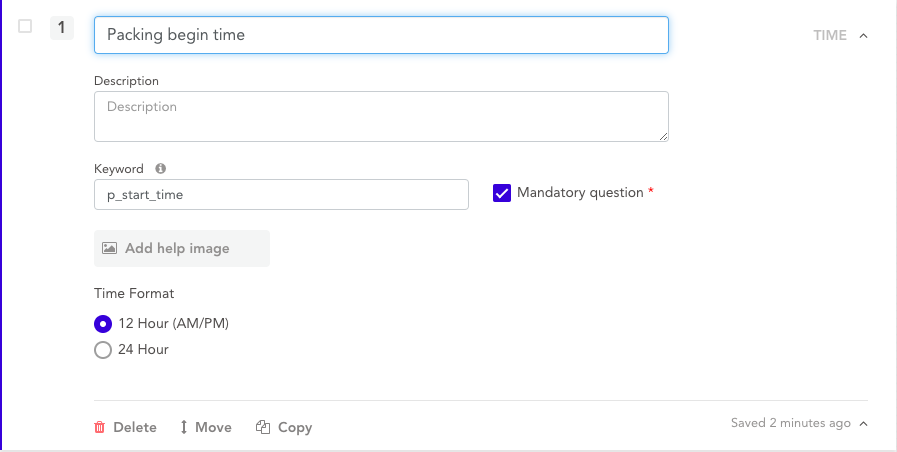
To create this question on the Collect web dashboard, we will add the following details:
- Question Title: "Packing begin time"
- Mandatory Question: Yes (Check-marked)
- Question Keyword: "p_start_time"
- Time Format: 12 Hour (AM/PM)
B. Answering a Time Question
When you open this question on the Collect app, it will look like the image below. To answer the question:
Step 1. Go to the time question and click on it to answer. You will be able to see a screen with a dial.
Step 2. Select the time you want to enter and click on "OK".
Step 3. If you have answered all other questions, click on "Submit" to submit the complete response.

Note:
In addition to time question, Collect supports 40+ other question types like image, location, signature, etc. You can read more about them in this detailed guide.